Well, it seems that I’ve got no reason to be paranoid about my age: I still can
do inline like I did (everyday) when I was a bit younger :).
On international workers day, 1st of May, Sam literally carried me out from
home, far from the computer, and we went skating. It’s been an awesome day,
we skated a lot, and shot some nice photos.
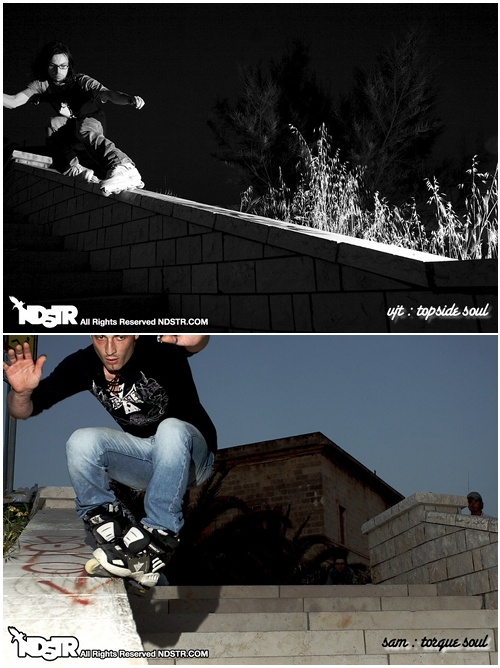
But the real good ones have been shot when ndstr caught
us. He is by far the best photographer you could meet, and of course my
favorite one (take a look at his site!).
He’s been also a skater, so he knows very very well how and when to shoot in
order to take out the most from your tricks :). Here are two of them,
portraying me and Sam while doing our best!
It was fun. Really fun. Thank you Sam for taking me out of home :D.
Well, I’m really happy with OSX 10.5.2. Even I’m not the one that blamed Apple
for the translucent menu bar that everyone dislikes.. well, I like it. I don’t
care about the TM menu bar tool, because I haven’t bought (yet) the nifty Time
Capsule, I like the spinner in the Airport menu and, most of all, I really like
the updates to the BluetoothSCOAudioDriver.kext that drives my bluetooth
headset.
Spotlight also feels faster and faster on every upgrade, and I’m a heavy
spotlight user, so this makes me really happy. Thanks Apple engineers!
Back to the topic: why odissey? Because as per my battery
hints, I managed
to make my MacBook2,1 SHUT DOWN while at 74% of the “Writing files” phase of
the combo update… resulting in a completely broken system, as every geek
could imagine :). Apple updated some libraries, and upon reboot simply nothing
worked, and the darwin console was filled with lots of error messages.
The standard apple fanb^Wuser would have simply archived and installed his
system, but hey, I’m a proud geek! I know from experience that disaster
recovery situations are the best ones to learn something about an operating
system, because you have to help the system boot up, bringing services up by
hand, and find some way to re-apply the combo update without using the easy
Aqua interface.
Luckily enough, on OSX every GUI has its CLI counterpart, following the best
“UNIX guidelines” of interest separation and well designed architecture.
Furthermore, OSX takes this approach one step further, following the best
software engineering principles, where functionalities are implemented in
Frameworks and both the GUI and CLI interfaces use it. Well done!
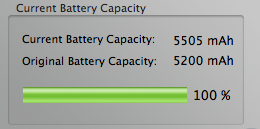
DO NOT leave your charger connected when the battery is charged, even when
you go to sleep.
DO let it discharge completely, when using it wait till it reaches 0%, when
sleeping it leave it alone, when you’ll wake up and you’ll open it, a resume
from suspend to disk will greet you. OSX FTW.
Monitor it and show off OSX performance counters to your friends (images
courtesy of
CoconutBattery.app and System
Profiler.app)
While happily installing prerequisites to build an app on Solaris
11, i enjoyed having
Mercurial already installed in the base
system.. except for a BIG issue: digest authentication was broken. I
tcpdump’ed the traffic exchanged between the mercurial client and the CGI
server and I saw that no Authorization header was sent, and obviously the
server refused to serve the hg repository.
Before reinstalling python, maybe from source and replacing the default
installation or having side by side two different versions, with consequent
nuisances and dirt around the system, I tried a very very small patch to
urllib2.py that… amusingly enough, fixed my problem:
I’m no fscking python expert (but the language is interesting), so don’t ask me
WHY it works, i simply followed the add_header comment that said “this method
is useful for adding authentication headers” and replaced the
unredirected_header method with the former. I really don’t know why with
Python2.5’s urllib2 “everything works” even with that method, something must be
broken somewhere else. A diff between the two urllibs gave me nothing, I really
should learn Python one day or another.
I also found no information by googling keywords such as «solaris “http
{authorization,authentication}” {urllib2,python} {broken,not working}
mercurial» (shell interpolation intended), so I hope this post will be useful
to someone ;).
UPDATE: you don’t need this code, because starting from the 2.2 version of Rails, localization support is built-in.
Localization for Active Record error messages
Today i had to answer to one of the questions every non-english Rails developer
stumbles upon now or after.. how to localize AR error messages for pleasant
appearance to a non-english customer ;).
First off, thanks to defunkt’s excellent gibberish
plugin and to the way AR validation errors are exposed, the task was
accomplished in an easy and clean manner, without messing too much with AR’s
internals.
I started by translating every default AR error message, with this translation
file located in lang/it.yml:
# Active Record errors#ar_accepted: "deve essere accettato"ar_not_a_number: "non è un numero"ar_blank: "è un campo obbligatorio"ar_empty: "è un campo obbligatorio"ar_inclusion: "non è nella lista dei valori validi"ar_too_long: "è troppo lungo (massimo %d caratteri)"ar_exclusion: "è riservato"ar_too_short: "è troppo corto (minimo %d caratteri)"ar_invalid: "non è valido"ar_wrong_length: "è errato, dovrebbe essere di %d caratteri"ar_confirmation: "non corrisponde"ar_taken: "esiste già"# This one is not a default key, but I use it in my validationsar_greater_zero: "deve essere maggiore di zero"
The first one simply sets Italian (:it) as the default language, the inject
builds a new error_messages hash using Gibberish to translate the default ones.
I named every AR error key in my translation file with an “ar_” prefix, in
order to avoid possible future key clashes. Finally, AR array is overwritten
with the new one freshly built.
Five minutes ago, I overwritten the super-shining-new CSS stylesheet that
implements the current color scheme, because i wanted to restore the original
one and put it in a new theme for this site, so that people who enjoyed the old
theme could continue to use it. But, as the most kiddiest system administrator,
i uncompressed the original files from the backup archive OVER the current
ones..
Safari to the rescue! Every cached item by safari is stored into a SQlite3
database located in ~/Library/Caches/com.apple.Safari, let’s inspect how it
is structured:
Wow. Impressive. That’s why i love Apple products, because they are so well
structured that you can freely inspect them and use them and their resources
for every unplanned task you could have to complete.. even to fix your own
mistakes ;). And it’s also intriguing, because you have to scratch your own
itch and find the solution while exploring a beautifully constructed software
product.
To make a long story short, every cached URL is stored into the request_key
field of the cfurl_cache_response table, while in the receiver_data field
of the cfurl_cache_blob_data there is the actual cached data. Now we can look
for the overwritten bbs theme CSS stylesheet:
Add /usr/local/include to BASECFLAGS in Makefile (autocrap sucks).
Patch Modules/ctypes/_ctypes_test.c by putting an #ifdef HAVE_LONG_LONG around functions that use PY_LONG_LONG (hints: lines 384 and 318).
Patch Objects/longobject.c and on line 817 put the IS_LITTLE_ENDIAN macro before the #ifdef HAVE_LONG_LONG block, and put _PyLong_FromSsize_t and _PyLong_FromSize_t after the HAVE_LONG_LONG block.